
Introduction:
When it comes to malware analysis and reverse engineering, in most cases, you will want to have your AV and security tools disabled. The main reason for this is so your AV doesn’t accidentally delete and/or block a sample when you are trying to work on them.
In this short post we will go through some steps to disable Windows Defender on our analysis VM.
Editing Virus & Threat Protection Settings:
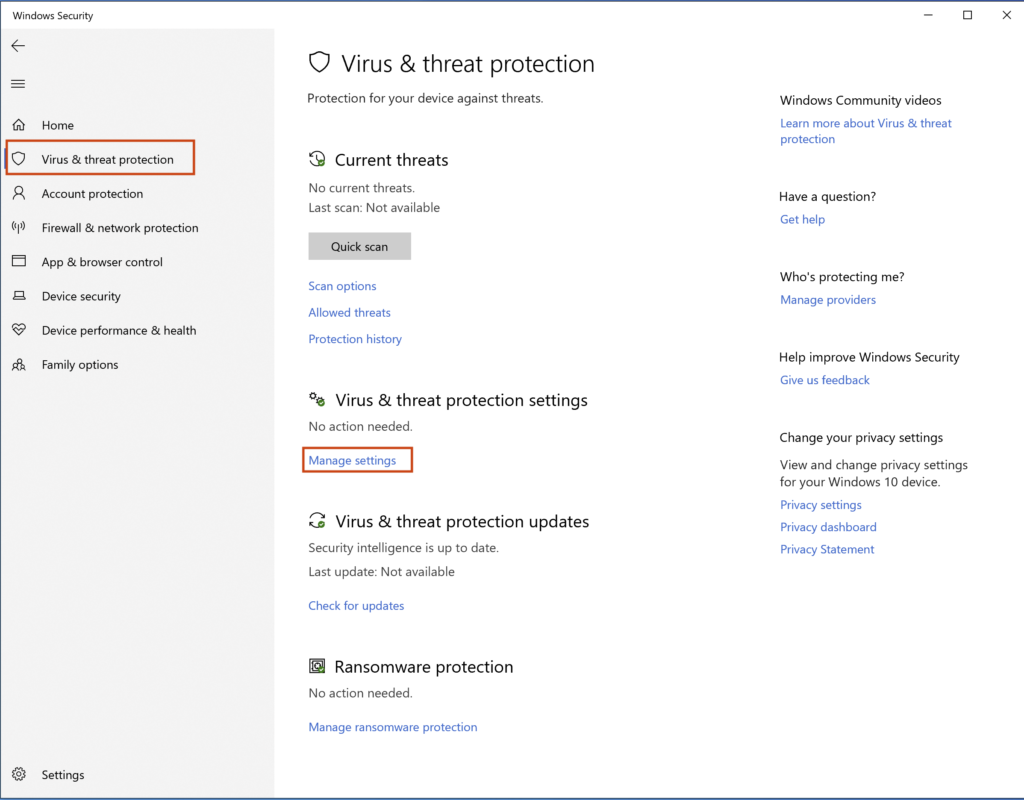
The first thing we should do is open up the Windows Security app on our Windows 10 VM. Start –> Type Windows Security –> Open App –> select Virus & threat protection tab –> click Manage Settings under Virus & threat protection settings
Once we are in the settings page, turn off Real-time protection, Cloud-delivered protection, Automatic sample submission, & Tamper Protection.
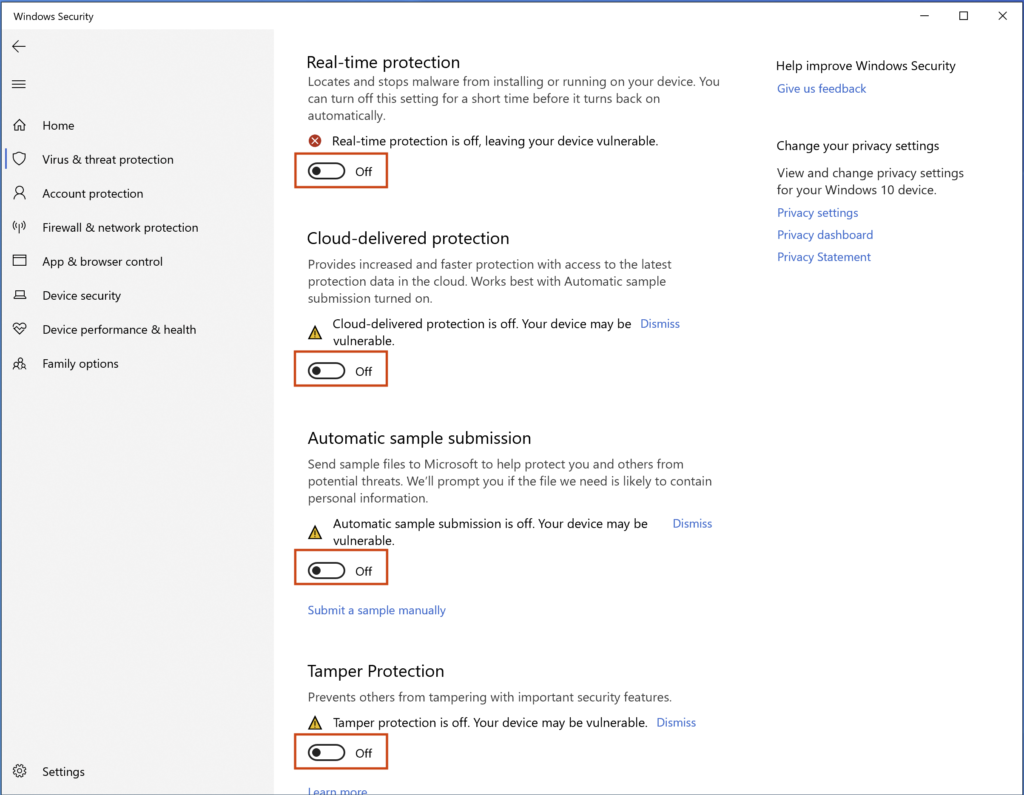
By turning all of these settings off, Windows Security will not constantly eat and/or stop samples from running on you analysis machine.
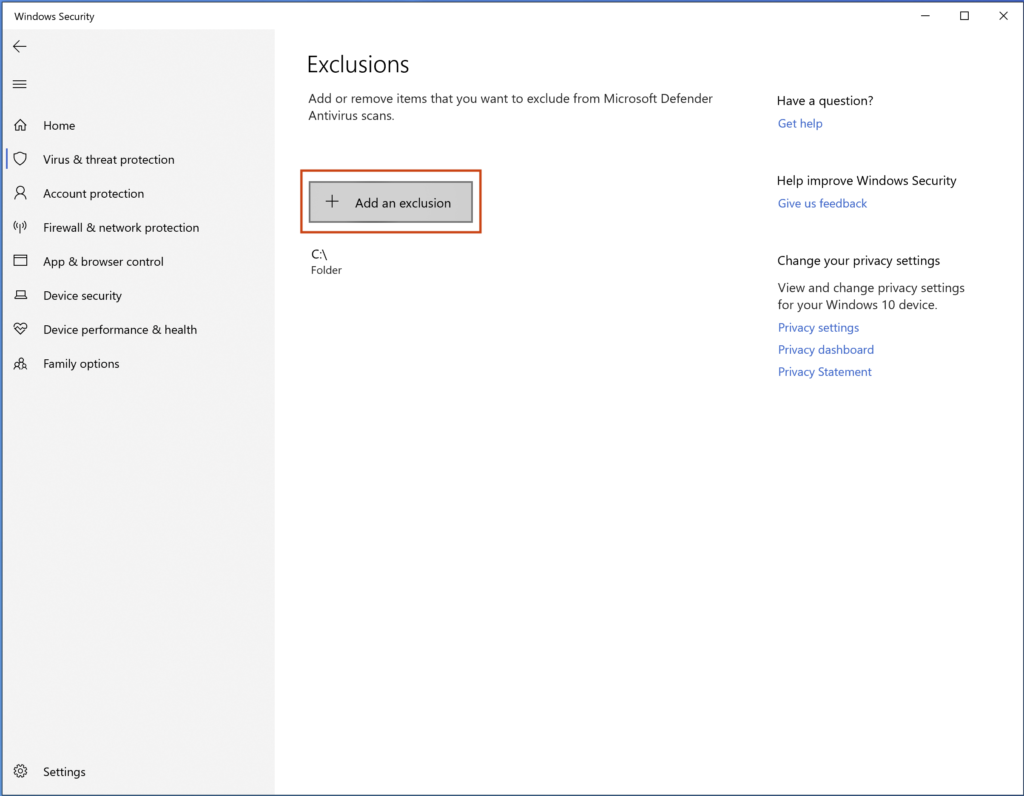
Another step we should take just in case Windows Defender turns itself back on after a reboot is we can add our C:\ drive to the exclusion list so that Windows Security will ignore any files there. To do that just scroll down to bottom of the same page and you should see Exclusions.
Click Add or remove exclusions –> + Add an exclusion –> select folder –> type C:\ –> click Select Folder
After doing this you should see the C drive added under the + Add an exclusion button.
Permanently Disabling Windows Defender via Group Policies:
Another way we can permanently disable Windows Defender is by editing our Group Policies. For those of you using a Developer image from Microsoft, you may or may not be able to edit the Group Policies. If you can’t disable via group policies, the steps above will do the trick. Just make sure to take a snapshot of your VM after doing this so you don’t accidentally have to do this all over again.
Now to edit our Windows Defender group policy we need to:
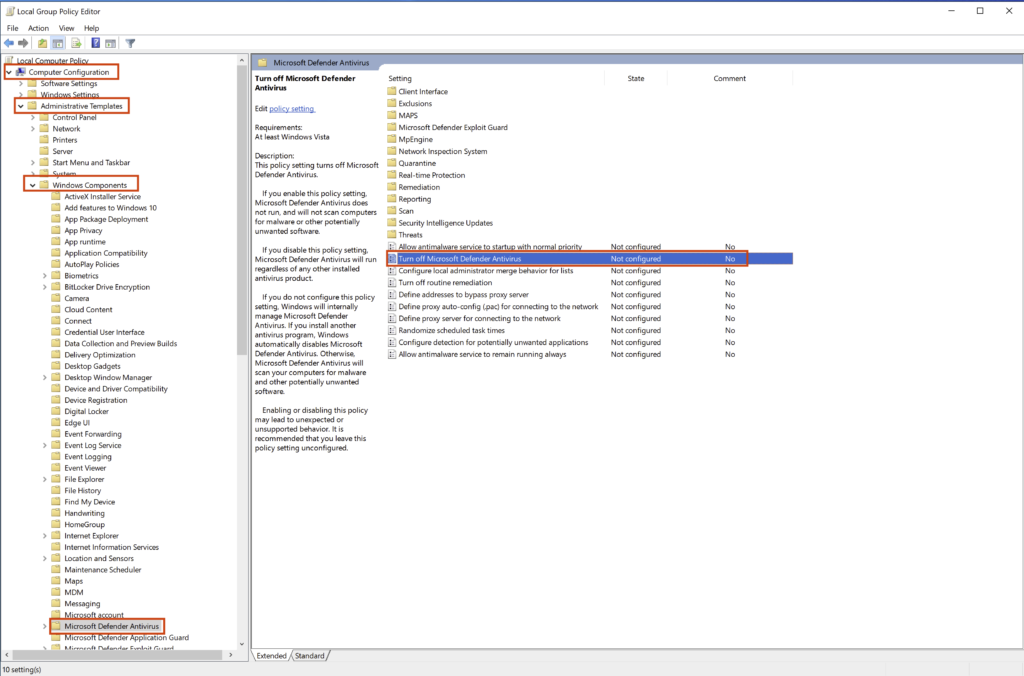
Hit Start –> type gpedit.msc –> Open Group Policy Editor –> Navigate to Computer Configuration –> Administrative Templates –> Windows Components –> Microsoft Defender Antivirus –> Double Click Turn off Microsoft Defender Antivirus
It should look like this:
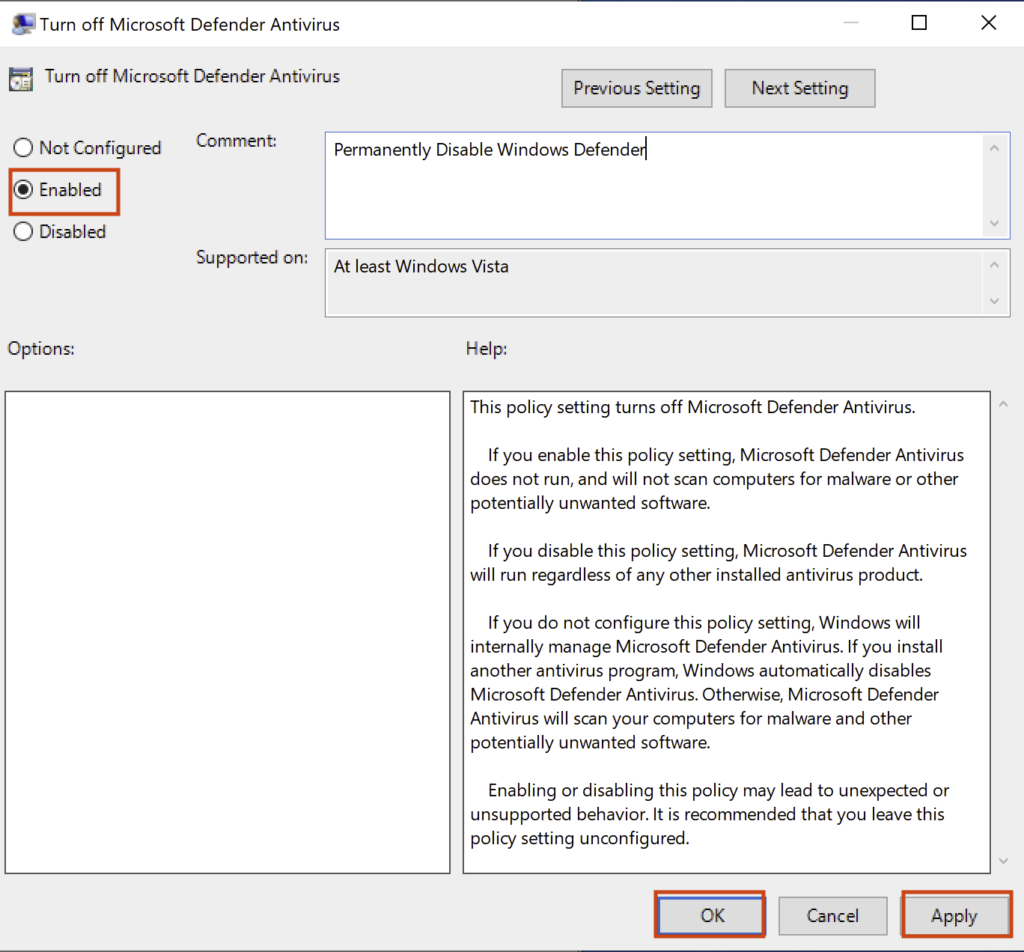
You should now be presented with the Turn off Microsoft Defender Antivirus policy window. In this window we need to:
Select Enabled –> Click Apply –> Click OK
If you want, you can also type a comment to explain what you are doing but it’s not a requirement.
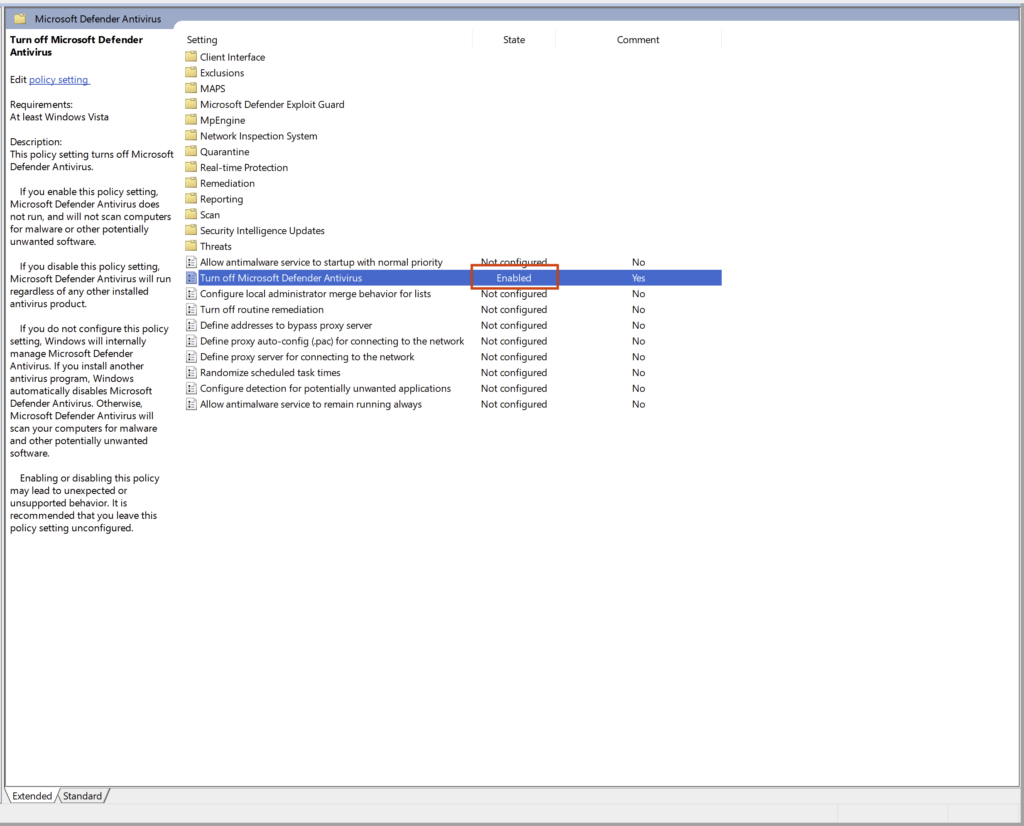
Once you hit Apply & OK the window will disappear. You should now see the same policy with the State field labelled Enabled.
Final Thoughts:
If you are able, permanently disabling Windows Defender makes it so much easier to examine various samples while doing your work. There have been several times early on when I forgot to do this on a new analysis VM and Defender would quarantine and delete my sample.
I’m working on several different things at the moment including a Log4Shell post that goes about setting up an environment to see the vulnerability in action. As well as writing another quick post on permanently disabling ASLR on your Windows analysis machine. So if you are interested in either of these things, definitely follow me on Twitter where I’ll be sharing when I upload new posts.